Deploy to Vercel from a Selfhosted Gitlab instance
Deploy your Application to Vercel directly from a self-hosted GitLab instance with this step-by-step guide. Learn how to configure GitLab CI/CD pipelines, securely manage your Vercel API token, and automate deployments for your frontend apps

In this guide, we are deploying a Next.js application to Vercel from a local GitLab instance using CI/CD and a custom runner.
Prerequisites
- A GitLab instance running with Docker & Portainer (in the Cloud or on a local network)
- Node.js and npm installed locally on your PC
- A Vercel account
- A Next.js project
Prepare Vercel for CLI Deployments
- Install Vercel Cli on your Computer
npm i -g vercel- Login to your Vercel Account
vercel loginchoose your authentication provider and click enter
- This should open your browser, where you have to login to your Vercel account.
- Once logged in, you will get a success message. You can return to your console.
- Create a Vercel project by running this command
vercel - you can continue with the basic options, except for 'Link to your existing project?' enter 'n' for no.
- open the .vercel directory on your project on the machine, there should be your projectId and orgId.
Create a GitLab Project and Push Your Code
0:00
/0:17
- to create a GitLab project open your GitLab's dashboard
- Click on the "New project' button
- Set the same project name as your Next.js project.
- Set the access level for your Project and remove the checkmark for initialize the repository with a README.
Setup your CI / CD pipeline
- Head to Vercel and create a new account token
0:00
/0:21
- Set a custom name for the token so you can recognise it later.
- Select the scopes you want to grant the token
- set an expiration day.
- copy your token and paste it somewhere safe. For security reasons this token cannot be shown a second time.
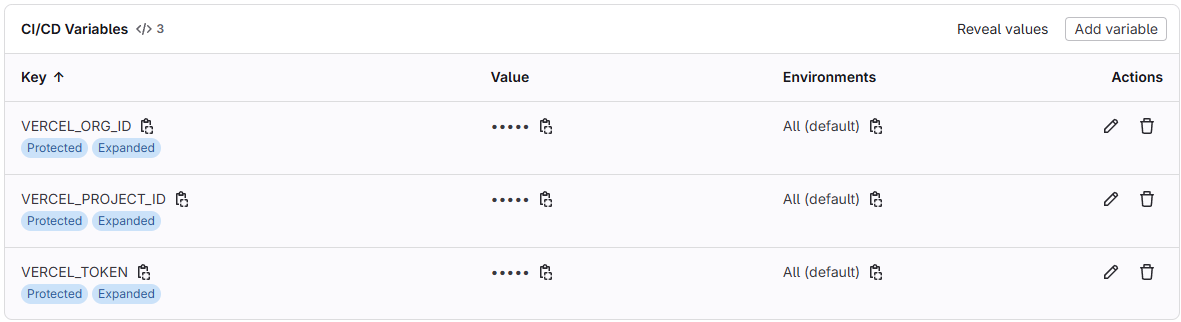
- Set your environment variables in GitLab
- Head back to Gitlab, open your project and navigate to your projects settings > CI/CD > Variables
- create a variable for your Token: enter
VERCEL_TOKENunder Key and under Value paste your Token - create a variable for your Project ID: enter
VERCEL_PROJECT_IDunder Key and under Value paste your projectId from the project.json file - create a variable for your Org ID: enter
VERCEL_ORG_IDunder Key and under Value paste your projectId from the project.json file
Set Up a GitLab Runner
- Login to your portainer web console - if you havent installed Portainer yet, check out my other guide - i promise, its quick
- Open your Docker environment
- Click on Containers in the sidebar, then click Add container in the top right
- Specify a name for the runner, in my case i called it testrunner, because i will delete it after the guide.
- Enter the GitLab Runner image
gitlab/gitlab-runner:latest- on the bottom open Volumes and map additional volume:
- under container paste this: /var/run/docker.sock and click on bind
- under host also paste this: /var/run/docker.sock
- select your GitLab's network in the Network tab
- in the Restart policy tab select 'always'
- Deploy the container
- Click on Console and connect as root
- Paste this snippet replace YOURGITLABDOMAIN.COM with your domain like gitlab.clickdavid.com
openssl s_client -showcerts -connect YOURGITLABDOMAIN.COM:443 -servername YOURGITLABDOMAIN.COM < /dev/null 2>/dev/null | openssl x509 -outform PEM > /etc/gitlab-runner/certs/YOURGITLABDOMAIN.COM.crt- Return back to your GitLab project, click settings > CI/CD
- Go to Runners > Create a Runner
- configure your runner: tags: docker, enable Run untagged jobs, set a runner description and click on Create runner
- Copy the Snippet shown in Step 1
- Paste this snippet in the portainer console
- Click enter, when it asks your GitLab instance url
- Enter the name for the runner
- Set the executor to docker
- Enter following default image: node:22.14.0
- Start the runner with:
gitlab-runner runCreate the Ci file in your Projects root directory
- Create the .gitlab-ci.yml file in your projects root with following contents:
stages:
  - build
  - deploy

.standard-rules:
  rules:
    - if: $CI_COMMIT_BRANCH == $CI_DEFAULT_BRANCH

frontend-build-job:
  stage: build
  image: node:22.14.0
  script:
    - npm install
    - npm run build

frontend-deploy-job:
  stage: deploy
  image: node:22.14.0
  script:
- npx vercel --prod --token $VERCEL_TOKEN --yes- Commit & Push the changes to your main branch
git add .
git commit -m "testing deployment"
git push --set-upstream https://YOURGITLABINSTANCE.COM/david/testproject.git master
🥳
Done, thats it! Not easy, but doable
If you found this guide useful, please consider subscribing or leaving a tip. Your support helps me keep sharing these kind guides!